

A shuttle launch is the perfect excuse to practice painting clouds! Based on reference from Pexels.


^ ‘Whoa Black Betty, bam-a-lam, yeah Black Betty …’
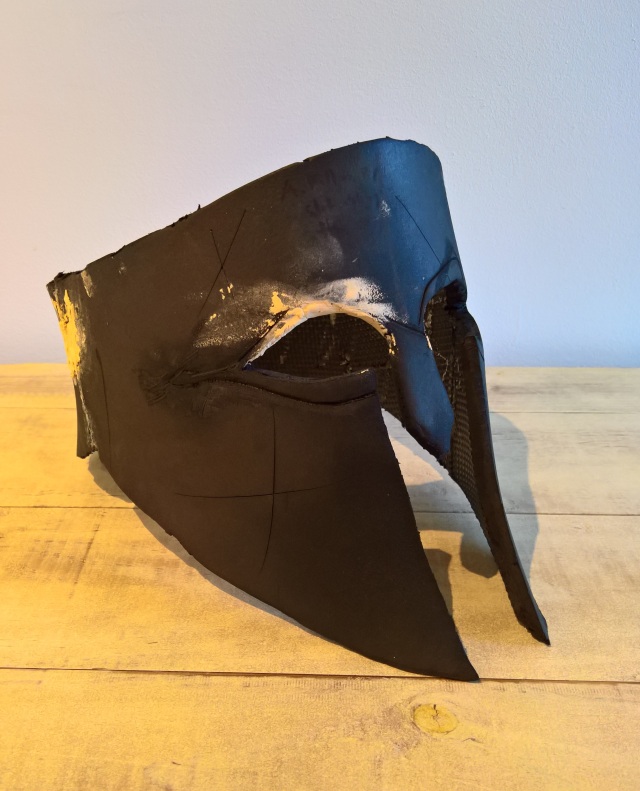
It’s always exciting to reach the priming stage, except for one thing: it lays ALL YOUR SINS BARE. Any mistakes or areas that need reworking will show up more clearly once the surface is a uniform tone. Not to worry, as this gives me a reprieve before painting in order to touch up with putty, then apply PVA to seal and then respray the black primer.

^’You can call me MURRAY! I will stride through the gates of hell, carrying your head on a pike!’
I was actually quite happy with how this stage turned out on its own. After painting with acrylics I gave it a light spray with some outdoor furniture touch-up paint, which gave it a rougher surface and toned down the lighter paint.

^ ‘Alright then. ROLL! Roll through the gates of hell! Must you take the fun out of everything?’
The first bronze coat is a roughly 2:1 mix of Burnished Copper and Forest Green, NOT completely blended so there is some randomness to the balance of metallic and green. This too was applied with a ripped sponge without adding water, just lightly dappled and scraped here and there – a little paint goes a long way in this case. In this way some of the previous grey oxidisation layer is preserved and shows through in small patches.

^ No there is not a Midas joke in here.
So at this point I was perhaps too liberal with the application of gold – in retrospect I should have dappled it with a lot less on a piece of steel wool, as I wanted more of the previous layer to show through. It does show through partially, but it will be up to further layers to tone down the C-3PO look.
Links to Other Steps – Making a Greek Helmet

^ So much dust, so few excuses for white powder to be accumulating on my property.
Got a chance before work this morning to sand back the putty, it actually sanded back quite well and is showing up quite smooth. I’ll leave some of the small potholes for a bit of variety to the surface. Pretty much all that’s left at this stage is to apply some 2mm foam around the eyes for the sculpted edges, then a coat of PVA to seal it all.

^ Anyone else for meringue?

The ‘visor’ or face of the helmet was fairly simple, the trickier part would be to mould the rounded cranium from foam. I began with a template by Evil Ted Smith but left the sides off for now, wanting to get the ridge of the cranium nice and symmetrical. As the glue I have takes time to set (I need to invest in the instant-tack stuff) I glued the top piece at the front, then once that was secure I heat-shaped the curve to match the back before gluing it. As I work I check the helmet fits ok, heating and reshaping as necessary.

^ One half of the crestbox. I added a third block in the middle.
The crest box is cut from foamboard (for those taking notes the inner curve is a 14cm radius, the outer was 20cm. Yay maths!). I layered up some squares and glued them inside the crest box to make it sturdier, leaving space to add the crest itself later. For added strength, I drilled a hole through these inner blocks into the helmet, then glued in dowel, to support the extra weight of the crest.

^ What better motivation to get up early for work than to get up early and work on something else?
Once the sides from the template were added, I used gyprock putty or ‘Spakfilla’ to fill in the gaps and round it off. Above is the first coat of filler, below is the second.

^ Looking more and more like fondant. Detecting an untapped market in Grecian cake decorating …
Most Greek helmets at the time feature a distinctive ridge where the cranium meets the lower half of the helmet, where the shape goes from convex to concave (I’m not too ashamed to admit having to look up which of those is which. Yay geometry!). When it comes to sanding I’ll need to retain that distinctive line that runs around the midway of the helmet.
 A note on putty: At first the only putty I had on hand was the type used on pine furniture – it’s the light brown stuff you can see in the photos. Turns out when combined with the smell of the glue I was using, this stinks very, very bad. It also sets harder, which would be fine but the amount of pressure needed to sand it risks deforming the much softer foam. By contrast the Spakfilla has almost zero scent and dries quickly, within half an hour or so, depending on the thickness. It also sands back with a lot less pressure.
The next step will be to sand it all down to a semi-smooth finish, then add embellishments in 2mm foam before prepping for undercoating.
Way back in the god-forsaken dark ages of torment and gnashing of teeth halcyon days of the HSC (senior year of high school for those outside Aust), I tried my hand at crafting wearable Greek helmets. I remember making 4 and 1/2 versions of the archetypal Korinthian helmet, all begun on a papier mache base which was then coated with a layer inside and out of fibreglass. The result was a sturdy final product with some interesting textures offered by the fibreglass, which gave the impression of oxidised bronze, but there were pitfalls.
Fibreglass once set can’t be remodelled, so it is important to get the base framework (in my case papier mache and cardboard) absolutely right before application. The fibreglass itself is applied much like wet plaster bandages, using the fibre sheets and a catalyst chemical in place of medical supplies. But once the fibreglass is set, sanding or cutting is not recommended as the fine powdery dust created can cause respiratory problems down the track.
So this year I began my first project in EVA foam, creating a set of Greek armour from the 5th-4th Centuries BCE. Cutting pieces out of EVA foam, then fanning them with a heat gun until they were pliable, I could shape and reshape the foam to achieve the subtle curvatures that were impossible to make out of fibreglass without using a plaster mould. The other advantage to working in foam is being able to try the helmet on and reshape it as necessary; I had to rework the eyes as the opening sat too high above my eyebrows, hence the putty fill on the right eye.
It has definitely been easier to scratch time out for working this way, as working with EVA foam only requires a bit of space and minimal tools outside of a heatgun and a few craft knives to work with, so minimal setup and cleanup.
